The first thing online shoppers notice about your store is your shop page. It’s where they browse and decide what to buy.
If your WooCommerce shop page design looks cluttered or uninviting, they might leave without exploring further. But don’t worry!
This guide will show you how to edit WooCommerce shop page step by step. You’ll learn to make it clean, attractive, easy to navigate and more convertible.
The main goal behind this is to offer a seamless shopping experience that keeps your customers hooked.
So, let’s get started!
Why edit the WooCommerce shop page?
The fundamental problem is that WooCommerce’s default shop page is not always suitable for your needs.
The default shop page from WooCommerce appears fairly basic, and it may lack the layout or features you require.
This is why editing your WooCommerce shop page is so critical.
So, whether you’re looking to fine-tune your product display, experiment with Gutenberg blocks or revamp your design with a page builder, this article will assist you out.
How to edit the WooCommerce shop page
There are many methods to customize your WooCommerce shop page, each with its own benefits and limitations. You need to figure out which one is ideal for you.
Here are five methods for editing a WooCommerce shop page:
How to edit WooCommerce shop page design with Gutenberg Blocks?
Gutenberg’s block editor makes it super easy to add and arrange elements. Gutenberg may not offer the same level of customization as dedicated page builders, but it is always advancing.
Gutenberg allows you to add content in individual blocks, with drag-and-drop design capabilities.
By default, WooCommerce assigns your shop page to display products but the issue is that it’s not editable like a regular page. To make changes:
- Go to your WordPress dashboard and navigate to
WooCommerce > Settings > Products. - Under Products, in the General tab, select the page you want to assign as your shop page. (or, you can create a new blank page and assign it here for full control over editing.)
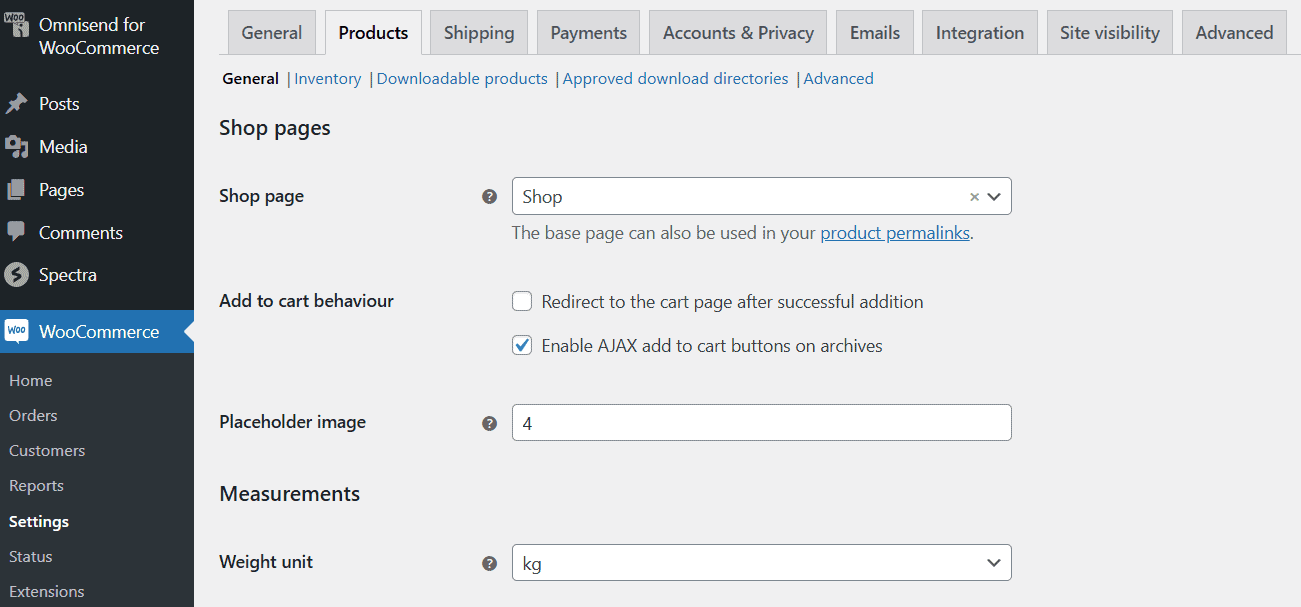
Once this is done, open the page in the Gutenberg editor. Keep in mind that you may need to back up your WordPress site before making changes to your Shop page template.
- Navigate to
Appearance > Editor. - In the Editor, click the dropdown menu at the top center of the page and select Browse all templates.
- From the available template options, locate and click on
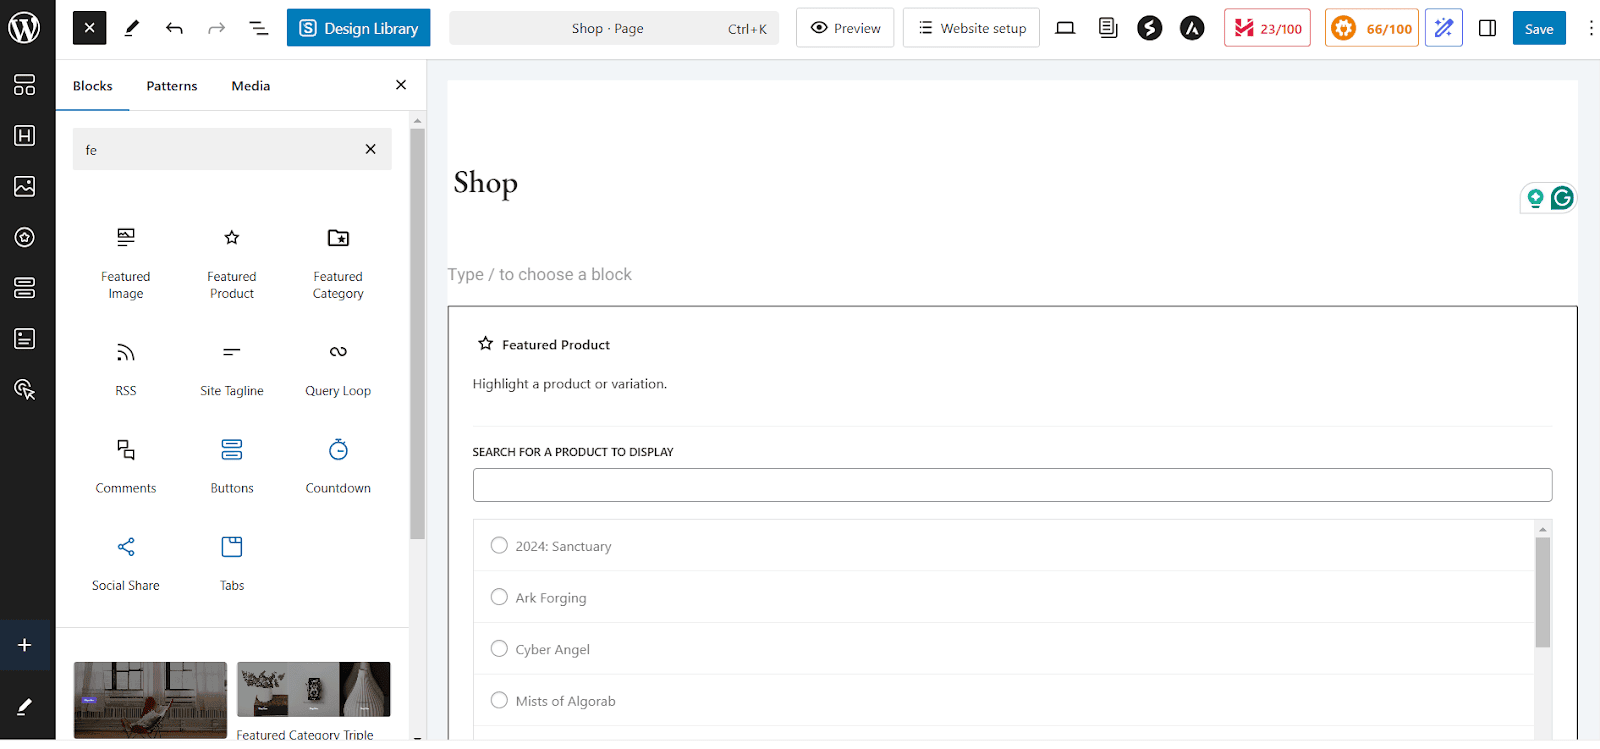
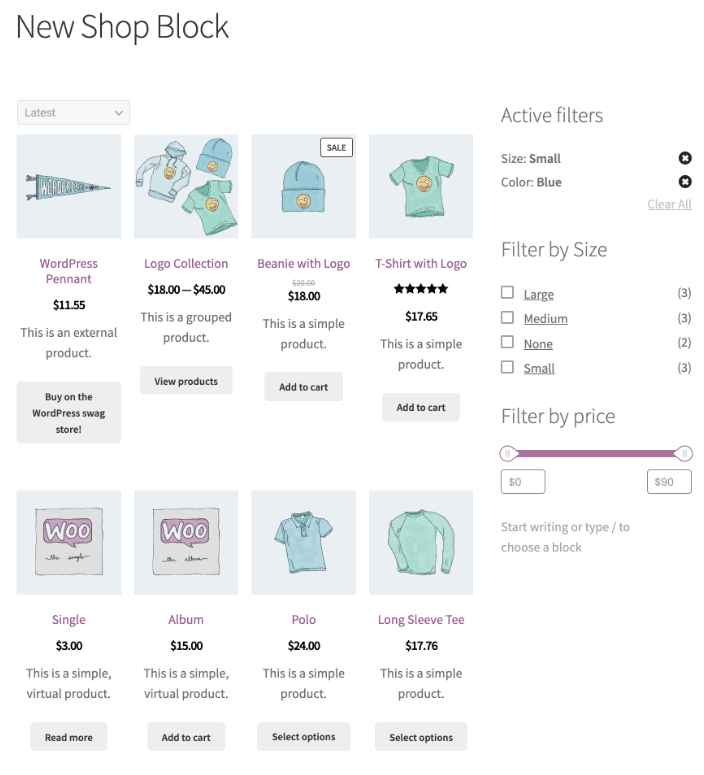
Product Catalog. This template includes sections like the header, footer and body (main content area). Click on any section to customize. You can add new blocks, such as an image block for your logo or a paragraph block for a tagline. You can rearrange the blocks as needed by dragging them or using the up/down arrows. - The body section will display a Product Grid Block by default. This block showcases product images, titles, prices and more. You can add new blocks above or below the Product Grid to enrich the page layout. You can use Columns Block to divide the content into sections or add WooCommerce Blocks like Best Selling Products or Featured Products to highlight key elements.
- If you want to add WooCommerce blocks, open the Block Inserter by clicking the
"+"icon and scroll down to dedicated WooCommerce drag-and-drop blocks such as All Products block, Filter blocks and Customer Review block. - You can also edit individual product elements. To do that, click edit to add product image, product title or Add to Cart button.
- In the sidebar, you can include filter blocks like price filters or attribute filters to help customers quickly find products.
- Once done with customizations, you can preview or hit publish to make the edit live on your WooCommerce shop page.
How to edit shop page using the WooCommerce customizer?
The WooCommerce Customizer also lets you tweak your shop’s appearance without coding. You can use this method for quick tweaks like changing product layouts.
To make changes to your shop page using the in-built WooCommerce customizer, follow these steps:
- Go to
Appearance > Customizeand then selectWooCommerce > Product Catalog. - You can customize the store notice, shop page title and description and modify the shop page layout and sidebar visibility.
- Change settings like product sorting, number of products per row and more.
- You can adjust the number of products displayed per page or choose the product layout (grid or list view). You can customize product image size and enable or disable product images.
- To make modifications to product category archives, change the product display layout or adjust the number of products displayed per page.
- Once done, preview changes or click publish to save.
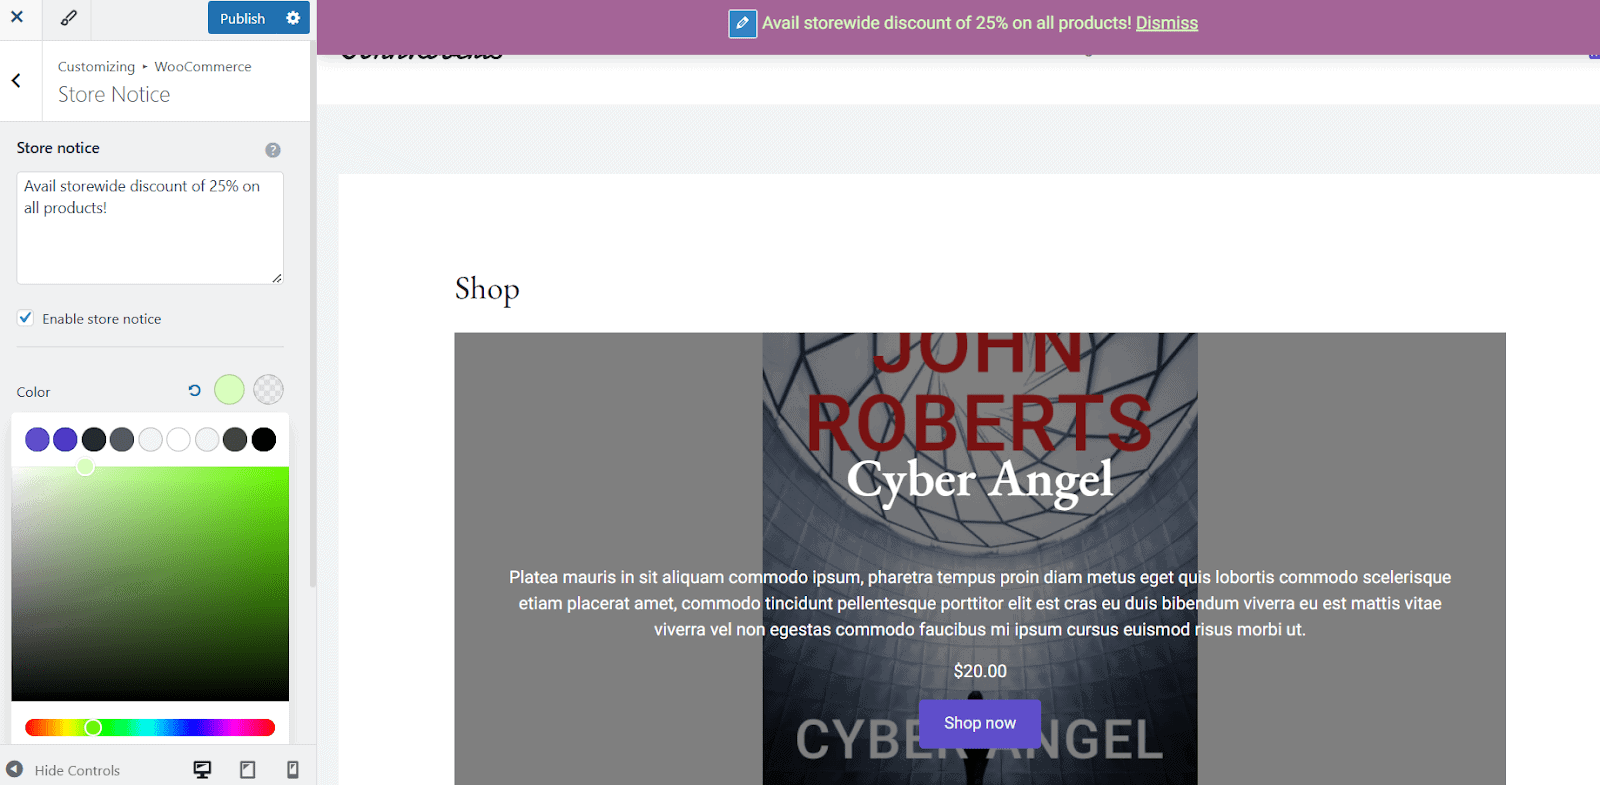
You can control the order of your products with the Default Product Sorting option. Choose from:
- Popularity (based on sales)
- Average Rating
- Newest Products
- Price (Low to High) or Price (High to Low)
For full control, go to Products > All Products > Sorting Tab, filter by category, product type or stock status, then drag and drop to reorder them.
You should also optimize your product images with the Product Images tab. Choose from:
- 1:1 Square Crop
- Custom Aspect Ratio
- Uncropped (uses original image ratio)
Editing a shop page with page builders like Elementor
Before going ahead with this third method, make sure you have the following:
- Elementor installed – Both the free and pro versions work, but Elementor Pro gives you access to WooCommerce widgets.
- WooCommerce add-ons or plugins (optional) – Some plugins offer pre-built templates for shop pages.
Then start with the following steps:
- Navigate to
Elementor > Settings. Under the General tab, make sureShopis checked. This allows Elementor to edit WooCommerce shop pages. - Go to Pages > All Pages and find the “Shop” page. Then click
Edit with Elementorto launch the Elementor editor. You’ll see Elementor’s drag-and-drop editor. (If the page is blank, no need to worry as WooCommerce content is usually added dynamically.) - Click the
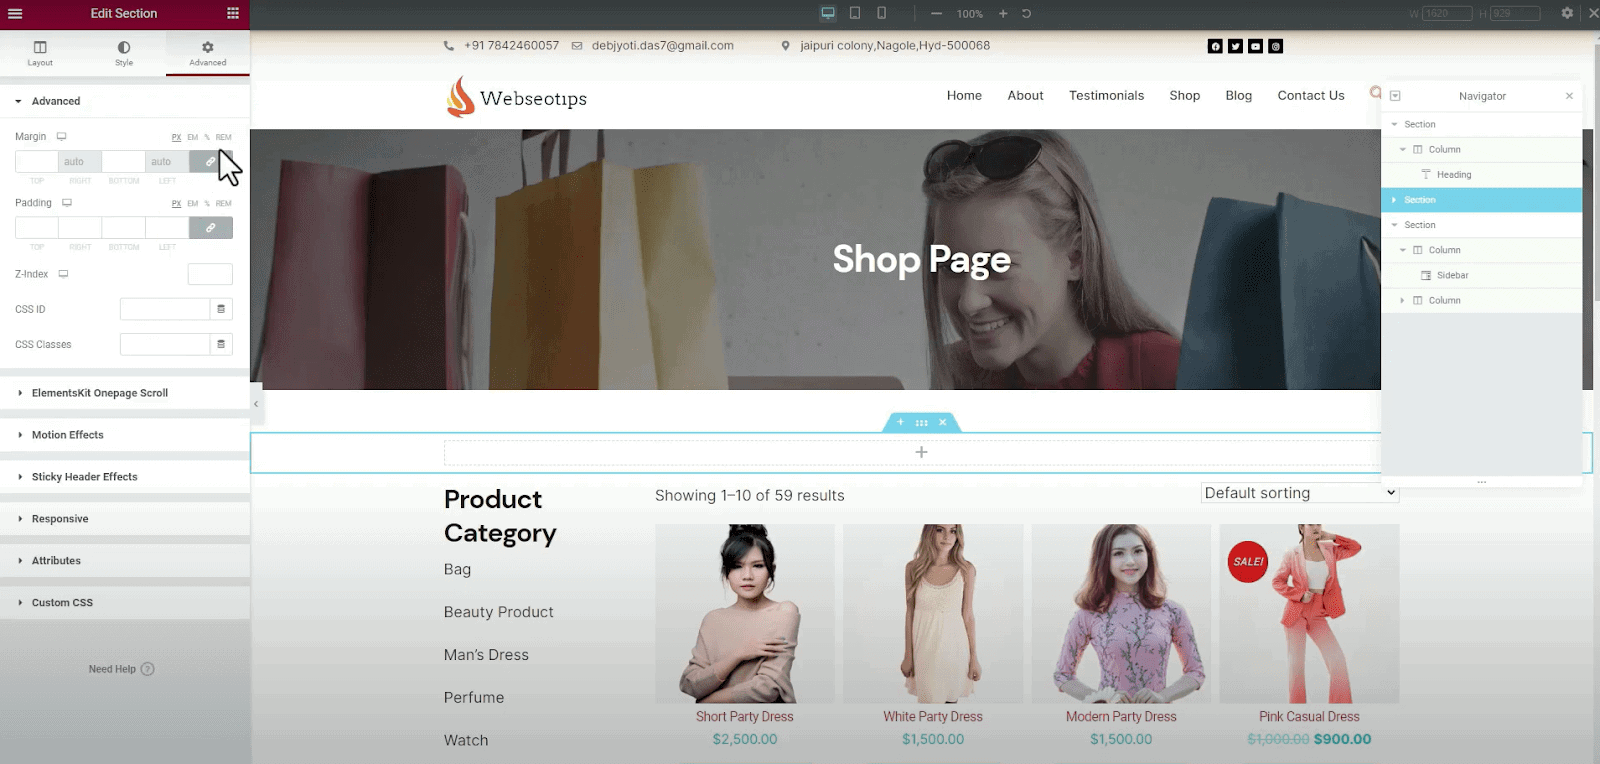
"+"button to create a new section and choose a layout structure (1 column, 2 columns, etc.). Elementor Pro users can use WooCommerce-specific widgets to display a list of your products or categories rather than individual products, as well as cart buttons on the page or a search bar for products or product reviews. - Now to change the shop design, click on any widget, then go to the Style tab to adjust fonts, colors and text sizes. Customize the “Add to Cart” buttons using Elementor’s design options. You can use Elementor’s Margin and Padding options to adjust the position of elements. You can also add custom banners, CTAs and “Limited Offer” announcements.
- Check the site’s responsiveness in the Elementor editor, then modify font sizes, button positioning and size of images for each device (desktop, tablet, mobile).
- Make final adjustments if needed, click preview or publish, and you’re done!
Editing WooCommerce shop design using shortcodes
Using shortcodes to customize your WooCommerce Shop page is one of the easiest and most flexible ways to do so. You can show products, categories, filters and much more with WooCommerce shortcodes without ever writing a line of code!
Shortcodes are what you need if you want complete control over the way your products are displayed.
- Go to Pages > All Pages and look for the “Shop” page and click
Edit. By default, you may land in the visual editor (Gutenberg or the Classic Editor). Switch to the text editor mode, which will display the HTML code of your page. - Now, you have to paste the desired shortcode directly into the text editor where you want the content to appear. Here are some common WooCommerce shortcodes:
- [products] – It is used for displaying all products.
- [products categories="category-slug"] – It displays products from a specific category. You can replace “category-slug” with the actual slug of the category (e.g., “t-shirts”).
- [featured_products] – Displays the featured products.
- [recent_products] – This shortcode displays recently added products.
- [product_category] – It displays a list of product categories.
- See previews of changes and if satisfied, go ahead with saving and publishing the page.
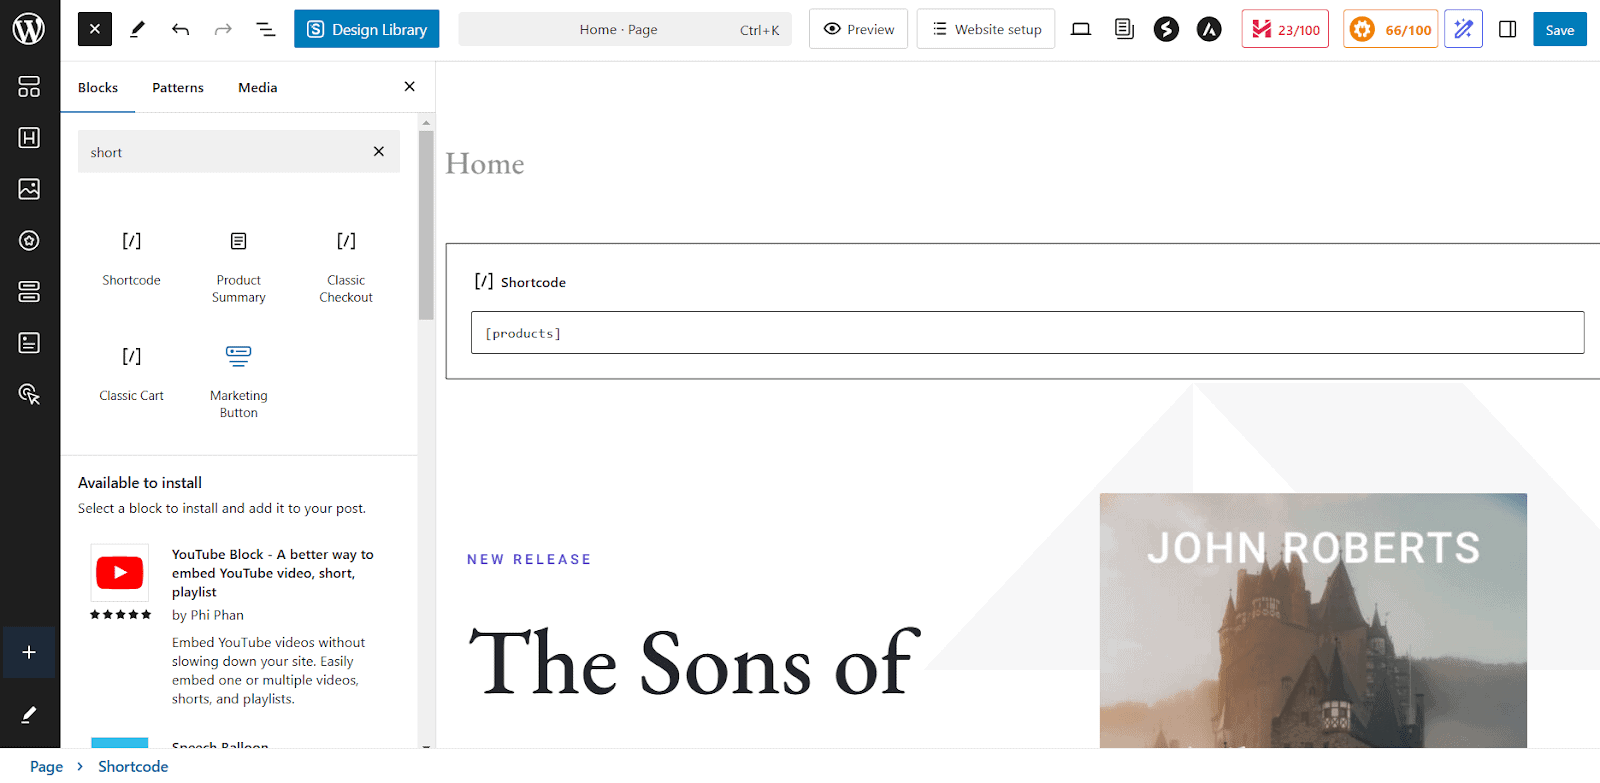
It’s vital to note that each shortcode has its own set of attributes that can be used to customize the displayed content, such as changing the number of products shown or the order they are displayed.
To showcase specific product collections on your WooCommerce shop page, you can use simple shortcodes to display sale items, best-sellers and featured products.
For example, to highlight sale products, use the following shortcode: [sale_products per_page="12" columns="4"]
This will display 12 sale products in 4 columns, making it easy for shoppers to spot ongoing deals.
If you want to promote your best-selling items, the shortcode: [best_selling_products per_page="10" columns="3"] will showcase 10 top-selling products in a 3-column layout.
Similarly, to display featured products, use: [featured_products per_page="8" columns="4"]
This allows you to spotlight 8 featured products in 4 columns.
You can also customize attributes within shortcodes to control how many products are displayed, their layout and sorting order.
For instance, the shortcode: [products limit="6" columns="3" orderby="date"] will display 6 of the newest products arranged in 3 columns, sorted by date.
How to edit a WooCommerce shop page with plugins
The fifth method lists two plugins that makes it easier and provides the much needed flexibility.
Product Tables for WooCommerce
With Codup’s Product Tables for WooCommerce, you can easily create multiple product tables using simple shortcodes.
These tables can be customized to display specific categories, featured products or a mix of products as per your store needs.
To create a custom product table, you can use a shortcode generator within the plugin. You can specify product categories, tags and other parameters.
Now, all you need is to place the shortcode anywhere on your WooCommerce shop page to display your custom table.
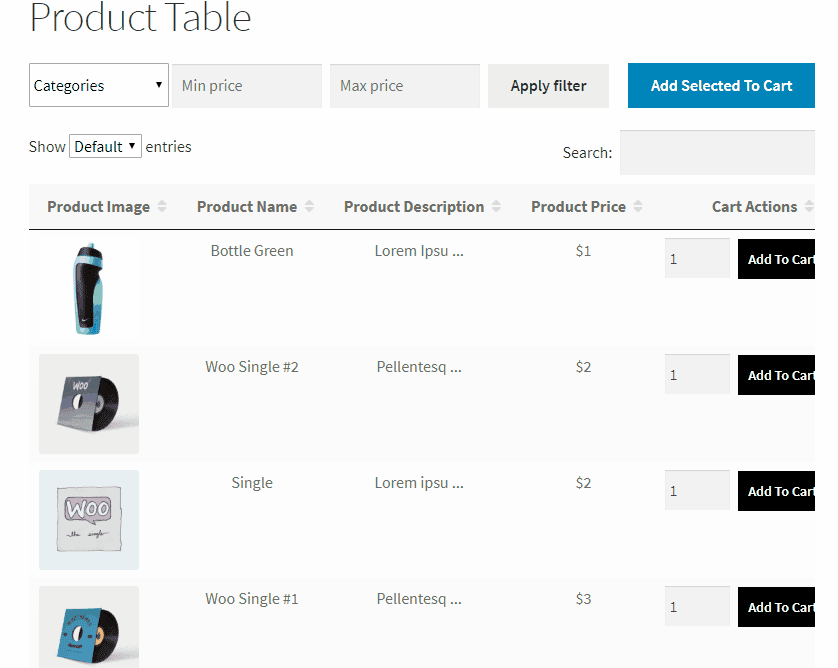
Now use the Product Tables plugin to customize the product information displayed. You can choose to show or hide product images, descriptions, prices, stock levels, etc. Here’s how to do it:
- Go to the Product Tables settings and select which product data fields to display.
- Choose from data points like product name, price, SKU, Add to Cart button, etc.
- Reorder or remove columns to fit your desired shop page layout.
- Enable the “Add to Cart” checkboxes in the plugin’s settings to let customers select multiple products and add them to their cart with one click.
- Add filter and sort options to the product table via the plugin’s customization settings. Choose which filters (like categories, tags or price) to display.
- You can enable product variation support in the plugin settings.
Get Product Tables for WooCommerce
StoreCustomizer
StoreCustomizer is a powerful plugin that allows you to completely customize your WooCommerce shop, product pages, and more without writing a single line of code.
It eliminates the need for custom PHP code, child themes or paying a developer for minor changes.
Furthermore, it’s ideal for non-technical users and busy entrepreneurs who want a professional-looking online store without the extra work.
Once the plugin is activated, go to the StoreCustomizer Dashboard in your WordPress admin area. Here, you’ll see a list of features you can enable.
Note that StoreCustomizer is designed to be lightweight and it only adds the necessary code for the features you turn on. So, go through the list and activate the ones you need for your shop.
- Open the StoreCustomizer Dashboard and find the feature you want to enable (e.g., “Product Quick View”). Turn on the checkbox and hit Save Settings.
- Once your desired features are enabled, head over to the WordPress customizer (navigate to Appearance > Customize).
- Now, you can rearrange or remove elements from your shop page or change fonts, colors and button styles in real-time. You can also tweak product display settings, like hiding product ratings or prices.
- Check the live previews and if ok, publish the changes.
If you want more advanced features, consider StoreCustomizer Pro. It includes features such as Catalog Mode, which allows you to display products without the “Add to Cart” button, making it great for catalogs or inquiries.
Other significant features include Ajax Product Search for faster, more predictive results, Custom Thank You Pages for a personalized post-purchase experience and Sticky “Add to Cart” Buttons that keep critical actions visible as customers scroll.
Conclusion
The five methods shown above will allow you to make changes to your WooCommerce shop page easily. All you have to remember is that the ideal method is determined by your technical skills and experience with coding and using tools such as the Site Editor or Gutenberg.
Always prioritize backups before making any changes to your WooCommerce shop design. Unlike posts and pages, WooCommerce templates lack a revision history.
In the end, try having a well-organized layout, clear product information and straightforward navigation.
FAQ
How can I customize the “Add to Cart” behavior on my WooCommerce Shop page?
You can speed up the buying process by letting customers add items directly from the Shop page and redirecting them to the Cart page. Read this blog on how to customize and replace the WooCommerce Add to Cart button.
How do I set a custom product placeholder image for WooCommerce?
If a product image is missing, WooCommerce uses a default placeholder. You can customize it to display your brand logo or a custom image. Follow these steps:
- Go to WooCommerce > Settings > Products > General.
- Paste the image URL or attachment ID into the Placeholder image field.
- Save changes, and your branded image will now appear for any products without images.
