How Save For Later For WooCommerce Works
Once the plugin is activated, the ‘Save For Later’ option gets automatically enabled for each product in cart.
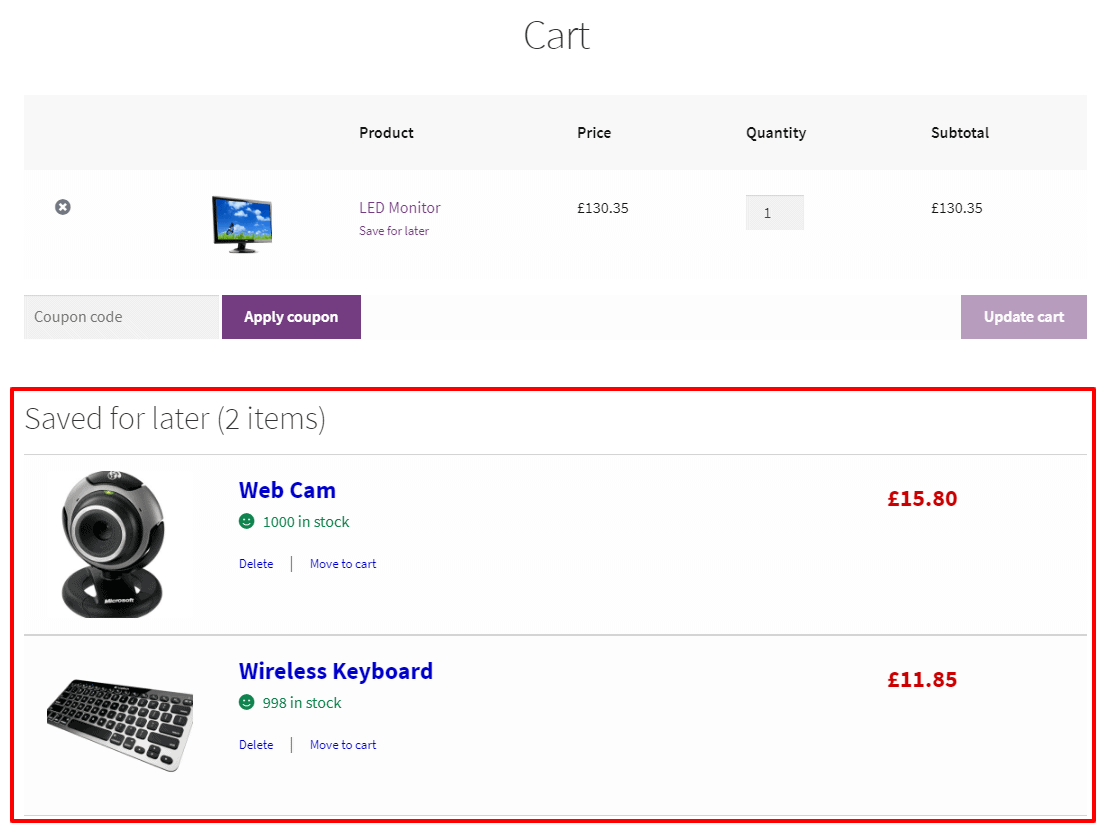
The user will find the ‘Save for Later’ option below the product title when that product is added to cart. This is one of the best places to show the option because the product saved by the customer / visitor will always be visible whenever he / she is purchasing another product.
Clicking on that option will move the items to the saved list.
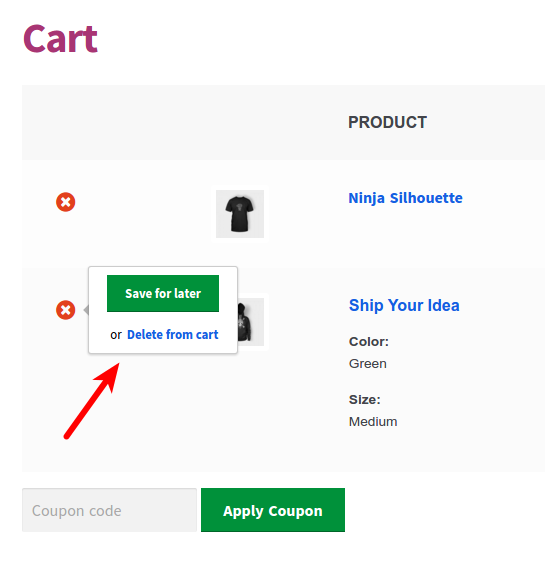
The plugin also gives an option to save products for later using the ‘Remove’ or ‘cross’ button. The option appears immediately when a customer or visitor has moved the pointer or cursor on the remove button. You’ll find this option under WooCommerce > Settings > Save for later.
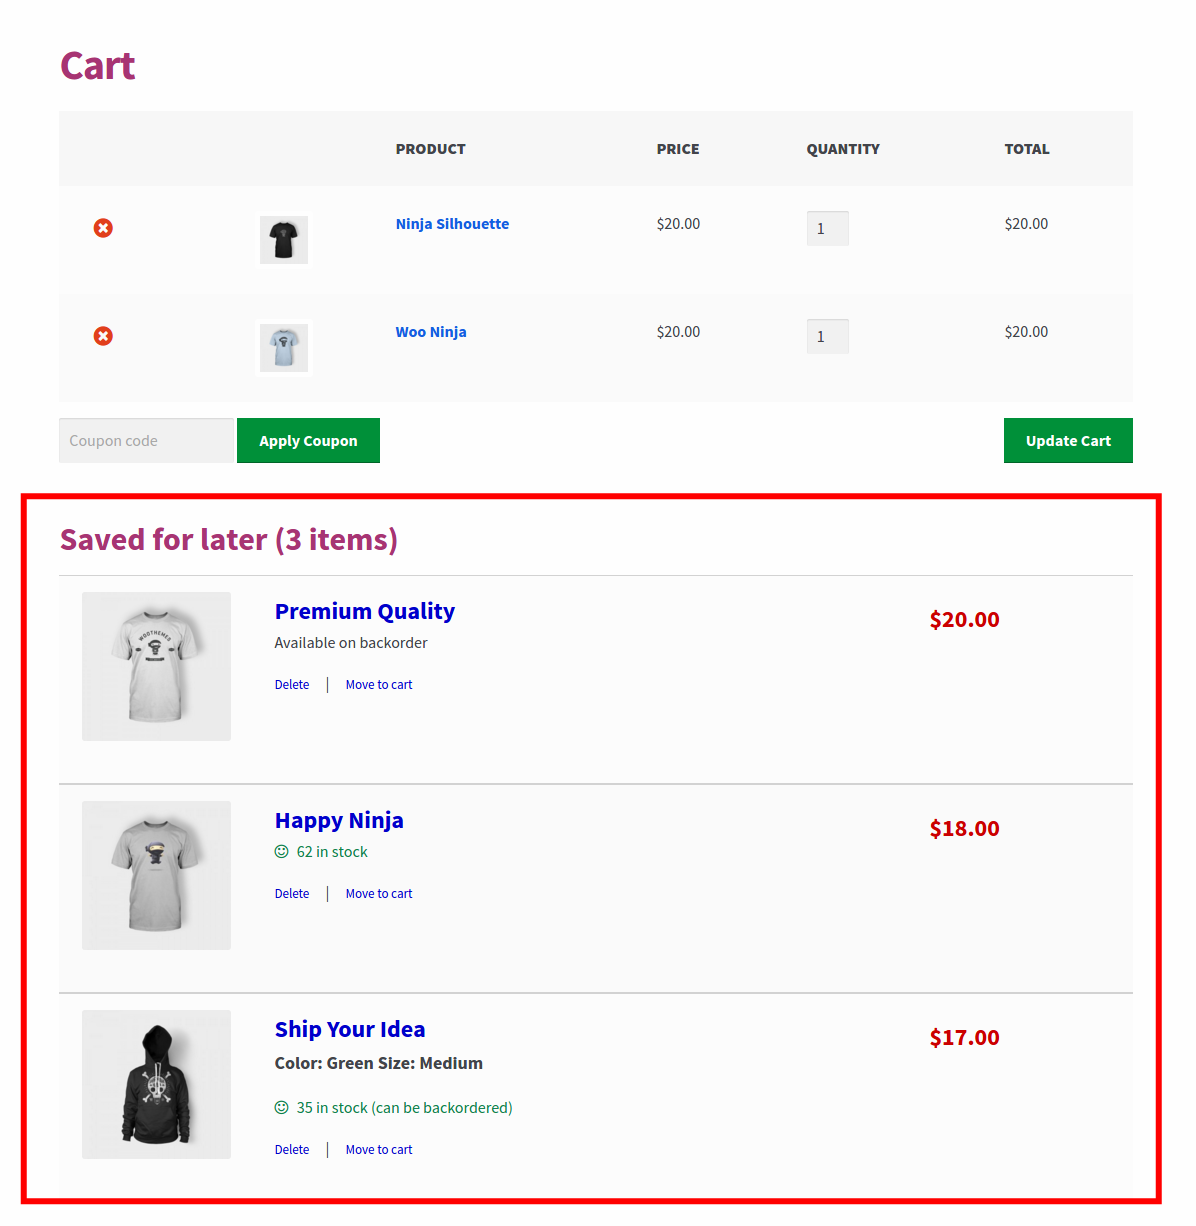
This saved list of items will be available under the ‘Saved for later’ section on the cart page. Here, the user has two options –
- Delete the product from cart
- Move the product from saved list to cart and complete the checkout
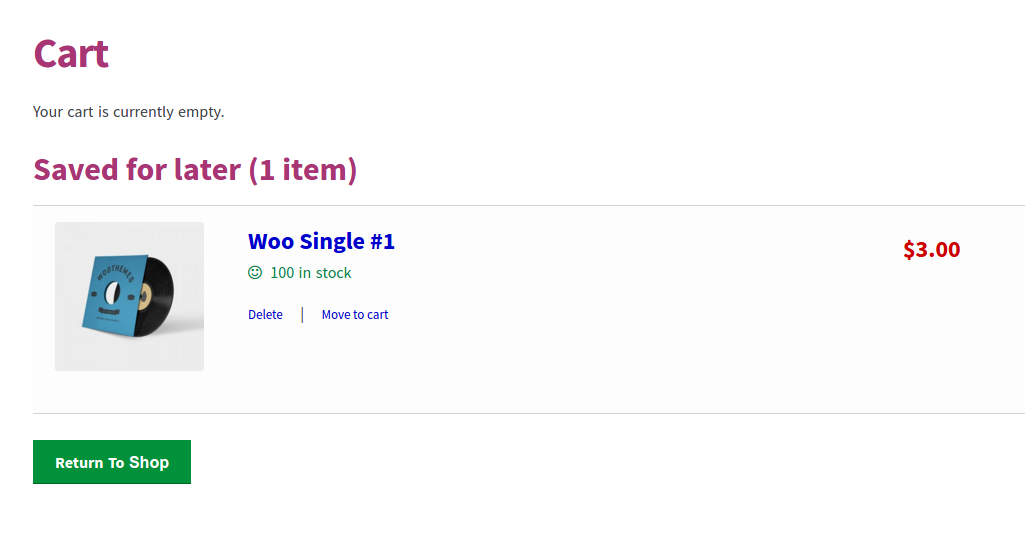
If a user has previously saved items to cart and if they return again, and go to cart page without adding any new product, their previous saved items will still be shown on the empty cart.
Let’s go through some screenshots to understand its functionality in better way.
Show Save For Later link below the product

Show Save For Later link on moving the cursor on the Remove button

Saved For Later list below products

Show saved items on empty cart
